
In this guide
At a glance.
- Ask the roofer to connect the proposed repair to a documented leak entry point.
- A useful scope names the flashing parts, surrounding roof work and exclusions.
- Agree on completion photos, written findings and a follow-up contact before work starts.
Chimney flashing repair should address an identified problem and explain how the roof-to-chimney joint will be repaired. Before accepting a quote, ask where water is entering, which parts will stay or change, and what records you will receive. “Seal around chimney” leaves too much to guess.
A stain near the fireplace can put flashing high on your list of questions. It does not tell you which repair to buy. You need a clear finding first, then a written scope that matches it.
This guide helps you read that scope without learning to bend metal or climb onto the roof. Your part of the job happens at a much more comfortable height.
Know which flashing part the roofer means
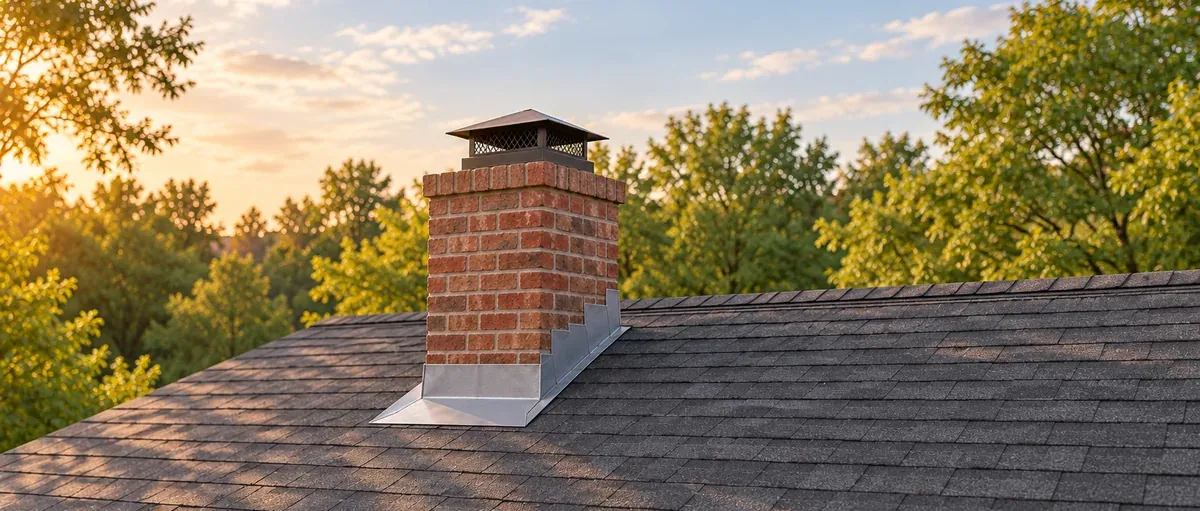
Flashing directs water away from the joint where the chimney meets the roof. GAF’s May 2026 flashing guide describes a two-part arrangement: base flashing connects with the roofing, while counterflashing covers its upper edge at the chimney.
Along the sloped sides, step flashing uses overlapping pieces worked into the shingle courses, or rows. These parts have different roles. Ask the roofer to point them out in photos of your chimney so the estimate’s wording has a clear meaning.
1. CounterflashingThe chimney-side cover.
2. Base flashingThe roof-side connection.
Follow the green arrowWater moves down and out onto the roof.
You do not need to memorize the names. You do need to know whether “replace flashing” means one piece, one side or the full area around the chimney. A marked photo can do more for that conversation than another paragraph of trade terms.
Start with the entry point, not the ceiling mark
GAF’s June 2026 leak-detection guide explains that water can enter away from the visible interior damage. A professional assessment can also find hidden damage to the roof deck or insulation. Leave roof and attic access to trained professionals.
Give the roofer a short history: when you first noticed the problem, which weather brings it on and what previous work was done. Include dates and photos you already have. Our heavy-rain leak guide can help you organize those observations.
If this spot has been repaired before, share the old invoice as well as the date. Ask what the new visit has found that the earlier work did not address. A repeat symptom deserves an explanation of the next step. It does not, by itself, tell you whether the last repair failed or whether the current problem has the same entry point.
Then ask: “What did you find that connects this repair to my leak?” Request a plain answer that separates what was seen from what is still suspected. If part of the area could not be inspected, have that limit recorded too.
Suppose a report says “flashing looks worn,” but the quote promises to stop your ceiling leak. Ask what connects those two statements. An observed condition and an explanation of the leak are separate pieces of the decision. You are asking for the reasoning, not challenging the roofer to a vocabulary contest.
If water is coming in now, ask about temporary protection while the repair is arranged. GAF’s June 2026 storm-inspection guidance describes professional tarping as a temporary measure. Have the paperwork distinguish that visit from the permanent work.
Ask about the uphill side too
The side facing up the roof may be hard to see from your yard. GAF’s storm guide notes that this flashing is easier to view from the roof. Ask for the inspector’s photos of that area, not just the side facing the driveway.
A cricket, also called a saddle, is a raised triangular structure on the uphill side of a chimney. It splits runoff around the obstruction and helps limit pooling and debris buildup. GAF’s May 2026 cricket guide also notes that the cricket needs its own flashing connections.
If a proposal mentions a cricket, ask whether the work includes an existing one or adds a new one. Have the roofer explain the reason for that choice and any local requirements that apply to your house. A generic diagram cannot settle that question.
Compare the work behind “reseal,” “repair” and “reflash”
Treat these words as headings that need details. Do not assume two companies use them to describe the same job.
For a resealing proposal, ask which joint is being treated, what defect was found and which product is proposed. Ask why that work addresses the finding. The word “sealant” alone does not tell you whether the plan is suitable, temporary or incomplete.
For a limited repair, ask which pieces change and which remain. Request the location in writing, using a marked photo if possible. Have the roofer explain how the repaired area will connect with the surrounding roof.
For reflashing, ask what will be removed and rebuilt. Does the quote cover all sides? What happens to nearby shingles? Which chimney-side work is included? A larger-sounding label does not answer those questions by itself.
These are questions for comparing scope, not rules for picking a repair from a description online. If one company proposes a small repair and another proposes broader work, ask each to explain the difference using the inspection findings.
GAF’s April 2026 repair-assessment guide weighs roof condition, damage extent, repair history and relative cost together. If the discussion moves to the whole roof, use our repair versus replacement guide for that wider decision. Keep the chimney findings clear within it.
A quote exercise: what are you actually buying?
Imagine you receive the two fictional summaries below. They are writing examples, not bids for a real house or recommended repairs.
Missing: the location, finding, product and limits of the work.
Next step: Ask for a defined scope before comparing totals.
Clearer: the work area and one exclusion.
Still ask: Why these parts? Who handles excluded work?
Quote A is too vague to compare, but that does not prove the company plans poor work. Give it a chance to explain. Quote B offers more detail, but it still needs a reason for replacing the marked parts. You cannot pick the better repair from these sentences alone.
Now imagine both companies revise their proposals. One includes work only on the downhill face. The other includes both sloped sides too. Before comparing price, ask whether they found different problems or recommend different ways to address the same problem.
Send each company the same request: “Please mark the areas you will work on and explain why the other areas can stay.” That answer lets you compare the actual difference. You may discover that one quote includes a task the other company never considered.
If the revised scopes still differ, write the disagreement as one short question. For example: “Does the left side need work, and what finding supports that?” A second assessment can then focus on that point. Bringing a specific question is more useful than asking someone to vote for Quote A or Quote B.
Pay close attention to “other chimney work excluded.” Ask whether that means no such work was found, it was not assessed, or it needs another specialist. Those answers lead to different next steps. If another trade is needed, agree on who arranges it and the order of the work.
Set the rules for surprises before work begins
Ask how the company will handle a finding that becomes visible only after materials are removed. You do not need a prediction of every hidden problem. You need a process for seeing the finding and approving any added work.
Request a photo, a plain description and a written change showing the added work and price. Ask who will contact you and how they will protect the work area while you decide. Put that process in the agreement rather than leaving it to a hurried phone call.
Check the exclusions against your goal. Interior stain repair, separate chimney work and work elsewhere on the roof should each be addressed if they came up during the visit. “Not included” is useful information when you know about it before signing.
Also ask for the proposed materials and any written warranty terms. Who responds if the same symptom returns? What work does the warranty cover? Keep the actual terms with the estimate. A reassuring phrase in a conversation is harder to check later.
Decide what completion will look like
Agree on a small handover record before the job starts:
- Matched photos: Before and after views that identify the areas worked on.
- Work record: The parts repaired or replaced, plus approved changes.
- Open items: Anything still needing assessment or another trade.
- Follow-up contact: Who to call, with the written warranty terms supplied.
Ask the contractor to walk you through those records from the ground. Where work will be covered up, request progress photos too. They can help explain what was done, but a photo alone cannot prove a leak is solved.
Have the roofer explain how the completed repair was checked and what to report if you notice water again. Keep new observations with the original leak history. That gives a follow-up visit a starting point instead of leaving everyone to reconstruct the story.
The useful finish is a repair you can connect to the original finding, with a clear account of the work and a plan for unresolved questions.
Compare local roofing listings
Browse companies near you on Roofer Directory, then request an estimate from businesses you have checked. Ask about experience with similar chimney work, and verify applicable licensing or registration and insurance yourself.
Bring the same photos and scope questions to each conversation. Our contractor selection guide, roof maintenance checklist and roofing FAQ can help with the next steps.
Published by RooferDirectory. Learn about our sources and methods, or suggest a correction.